Install a Climbing hangboard at home allows you to have one of the best home training tools. You can work on your
strength, your
resistance, and your
endurance, while avoiding crowded rooms. However, setting a
Climbing hangboard can quickly become a complex task.
This article provides a detailed guide for
Install your training board safely, while exploring different methods adapted to each situation. Here's what you'll learn:
- What are the benefits of having a hangboard at home?
- How to screw a Climbing hangboard at home?
- How to repair a wall that was drilled after installing my Climbing hangboard ?
- Fixing solutions Drill-free existing
Find out how to efficiently set up your climbing training space and optimize your progress at home.
What are the benefits of having a Climbing hangboard at home?
Install a
Climbing hangboard A home setup, often called a hangboard or fingerboard, enriches your climbing training experience in several significant ways. Here’s how a home setup can transform your climbing routine and maximize your progress.
- Flexibility and rhythm control
To have a Climbing hangboard at home allows you to train at any time without depending on the schedule of a gym. In addition, if you climb indoors during peak hours, it can be difficult to occupy a Climbing hangboard for several minutes without interruption. Exercises where time is crucial, such as resistance or endurance exercises, are then complicated to perform in good conditions. Having a Climbing hangboard at home therefore allows you to focus on what matters, which is your training.
Own a Climbing hangboard at home allows you to fully customize your workout space to your specific preferences and needs. You are no longer dependent on the equipment available at the gym, which eliminates any frustration related to the unavailability or inadequacy of equipment. Whether you want to work on specific grips or focus your training on the Grip strength and endurance, you have complete control over the choice of exercises, their intensity, and their frequency.
Using the same equipment regularly increases the accuracy in tracking your progress. Equipment variations between different gyms can make it difficult to accurately assess your improvements. Having your own hangboard, you eliminate these variables, allowing for more rigorous and methodical monitoring of your performance. This can be crucial to adjusting your training plans and achieving your goals more effectively.
Additional Benefits
- Easy integration into daily routines : The proximity of the equipment makes it easy to fit short but frequent training sessions into your daily schedule, promoting the consistency that is key to climbing progression.
- Controlled environment : Master training conditions such as noise, concentration, cleanliness of holds, which is not always possible in a public room environment.
- Developing Personal Discipline : Self-managing your home workout routine can build self-discipline, a valuable asset in both climbing and everyday life.
- Family training possible : Turn working out into a family activity, encourage all family members to participate and stay active.
These benefits not only highlight the usefulness of having a Climbing hangboard at home but also how it can radically improve your climbing training, by providing a personalized and controlled environment for constant and measurable development.
How to screw a Climbing hangboard at home?
For solid walls (concrete, solid brick)
To find out if a wall is solid or hollow, tap it gently with your fingers: a hollow sound suggests a Hollow wall with drywall on studs, while a dull sound indicates a Solid wall.
Tools and materials needed
- Impact drill
- Dowels and screws suitable for wall type
- level bubble
Installation Steps - Marking: Mark the drilling points according to the fixing holes of the Climbing hangboard that you want to fix. You can help yourself with a level bubble wrap to ensure that your Climbing hangboard will be very straight.
- Drilling: Drill the holes in your wall using a suitable drill bit.
- Fixing: Insert the dowels then fix the hangboard with the appropriate screws.
For hollow walls (concrete, solid brick)
To install a Climbing hangboard On walls that are not particularly strong, such as placo or plasterboard partitions, it is recommended to reinforce the wall using wooden boards.
Tools and materials needed
- Drill and wood bits with a maximum diameter of 8mm
- level bubble
- 2 sheets of plywood or OSB (18mm thick and larger than the Climbing hangboard that we wish to fix)
- 4 bolts of diameter 8mm with 8 washers and 4 associated nuts
- Wood screws for its Climbing hangboard
- 1 clamp
Installation Steps: - Fixing holes: Position the two wooden plates one on top of the other and aligned. Lock the position of the 2 plates with the clamp then drill 4 holes using a wood drill bit at the 4 ends and through the 2 plates at once. Leave a sufficient margin of wood at each corner of the 2 plates.
- Installation of the first wooden plate: Position and lock one of the wooden plates against the wall using the clamp. If possible, the clamp should rest against the wooden plate and your door frame. Using a drill and keeping the wood bit, extend the 4 holes in your plate into the placo wall, going all the way through it.
- Fixing the two wooden plates: While trying to keep the clamp holding the first sheet as tight as possible, insert a bolt with a washer through the first sheet into one of the holes and use it to align the second sheet of plywood.Then add the other 4 bolts with their washers and then secure everything by adding 4 washers and nuts on the side of the second plate to tighten everything. Once everything is screwed in tightly, you can remove the clamp.
- Fixing the hangboard: Fix the Climbing hangboard directly to the wood plate that suits you best using the wood screws provided with your hangboard. You can use a level bubble wrap to make sure your Climbing hangboard is well positioned.
Fixing Solutions Drill-free For hangboards of Climbing
Install a Climbing hangboard, or hangboard, at home can often require permanent modifications that are not always possible, especially for renters. Fortunately, there are methods of fixing Drill-free which allow these training equipments to be installed temporarily and without damaging the walls. Here is an overview of each solution with their advantages and disadvantages.
| Fixing Method | Description | Benefits | Disadvantages |
| Modifying a Pull-Up Bar | This method involves adapting an existing pull-up bar to attach a Climbing hangboard. It requires a certain level DIY to securely hang the hangboard at the bar. | - Non-permanent: Ideal for situations where you can't or don't want to drill into walls.
- Use of existing equipment: Save money by using a pull-up bar you already own.
| - Installation complexity: Requires custom building a sturdy bracket that fits your door frame and pull up bar.
- Reduced stability: There hangboard is not as stable as if it were fixed directly to the wall.
|
| The Portico or Gallows | A self-supporting gantry is an independent structure that allows you to fix a Climbing hangboard without touching the walls or ceilings. | - Flexibility: Can be moved or dismantled if necessary.
- No home modifications: No drilling required, perfect for renters.
| - Size: Takes up space in the training area and is not easily or quickly dismantled.
- Manufacturing complexity: Requires being a bit of a handyman and having space and tools to saw wood, drill, screw, assemble.
- Cost: Can be high, especially if purchased ready-made.
|
| Compression Fixing with Clamps | Use clamps to secure the hangboard to a sturdy door frame without drilling or damaging walls. | - Quick installation: Assembly and disassembly can be done quickly but it is advisable to have two people for installation and disassembly.
- Economic: Use simple, inexpensive tools.
| - Limited stability: There hangboard may move during use.
- Potential frame damage: Since the door frame takes the majority of the load, it is necessary to have a very sturdy door frame.
- Not an obvious purchase: It can be difficult to find wooden clamps, compatible with our door frame and quite strong.
|
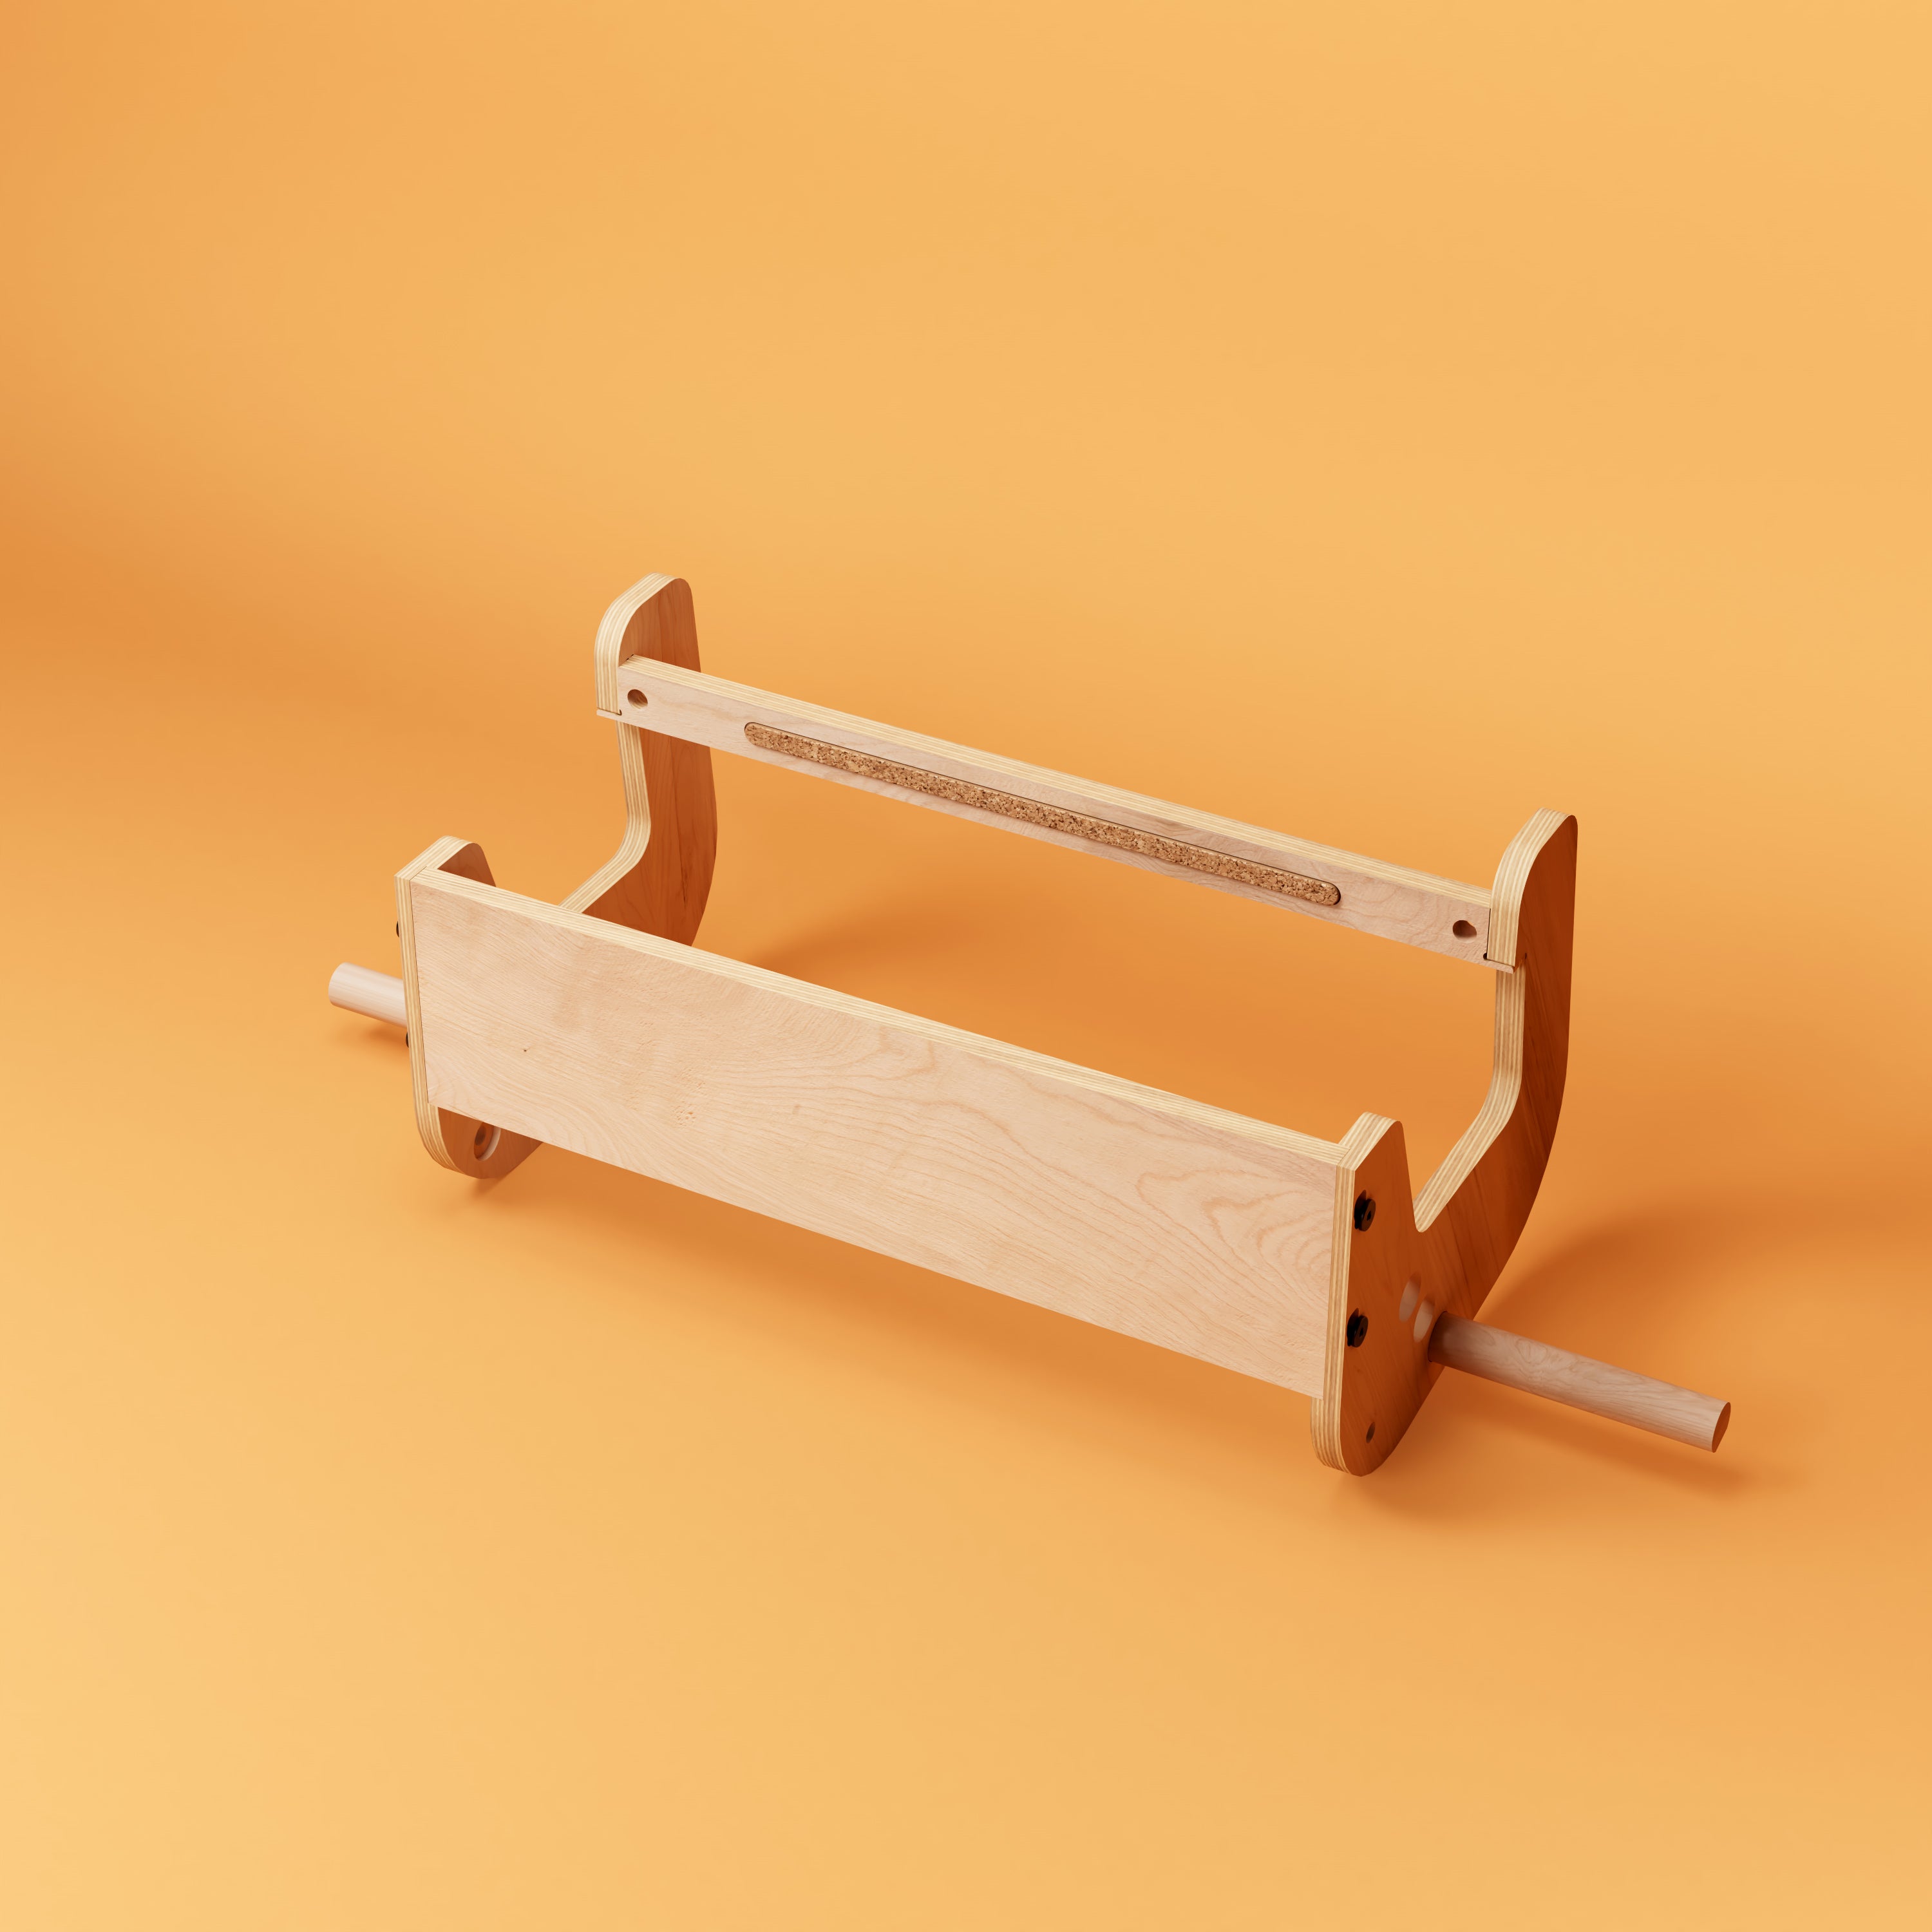
| There Deltabase: OUR Freestanding support | There Deltabase is a Freestanding support designed specifically for the hangboards climbing, providing a practical and stable solution Drill-free. | - Damage-free installation: Perfect for rentals or for those who don't want to drill into walls.
- Stability and safety: Provides a stable platform for safe training.
- Compatibility: There Deltabase can be used with many types of walls.
- Modular and flexible: Can be used with all hangboards climbing on the market. Assembles and stores quickly and without tools.
| - Initial cost: Higher initial investment than other non-permanent solutions.
- Required dimensions: There Deltabase is currently only compatible with certain door frame dimensions.
|
Here is the Deltabase which is installed on a gantry which exactly matches the dimensions of a standard door frame:
Instagram Post
Conclusion
Following this guide will allow you to take full advantage of the benefits of a Climbing hangboard at home, while ensuring a safe and effective setup that fits your living space. Choose the method that best suits your needs and start transforming your workout today. If you need more information, feel free to contact us here.


