


When you install a
Summary
- Introduction
- Filling the hole
- Repaint the hole
- Quick tip with toothpaste
- Conclusion
Introduction
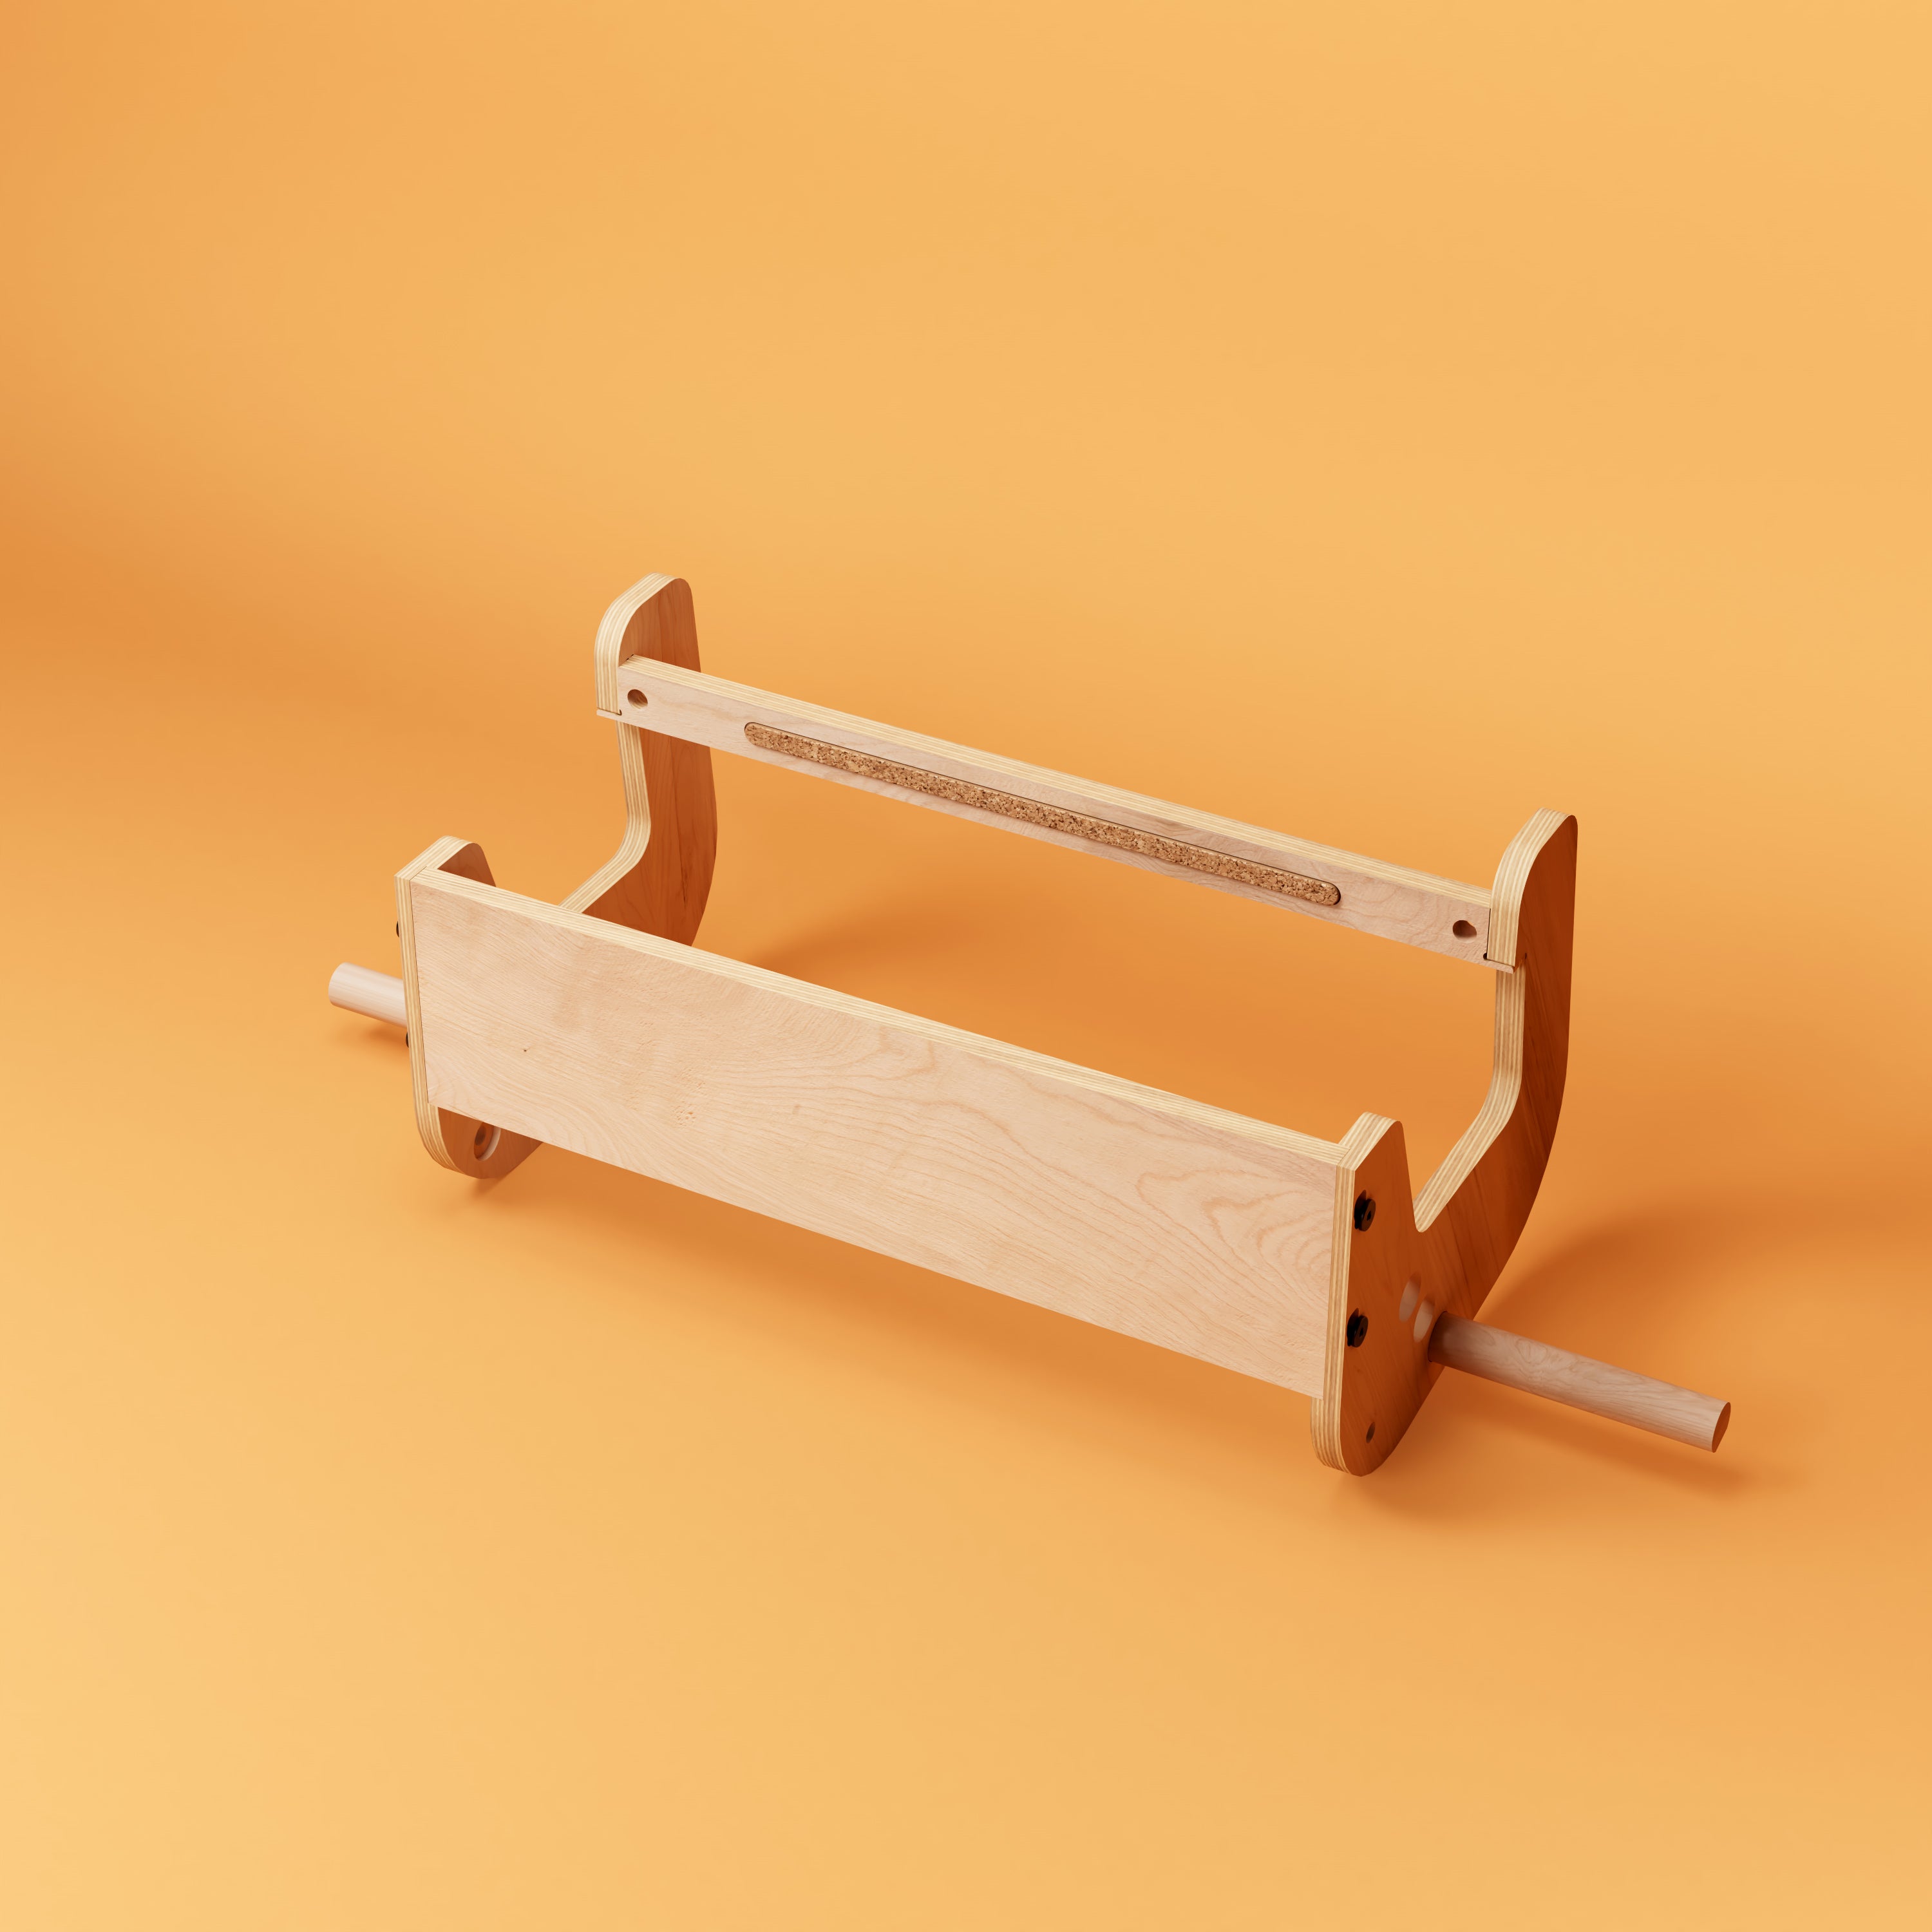
Whether you’re moving your workout equipment or renting out an apartment, patching holes in your wall is crucial to maintaining the aesthetics and integrity of your living space. This process is especially relevant for rock climbers who use wall-mounted equipment. This guide will help you patch a hole effectively in any type of wall, whether placo, brick or concrete.
Filling the hole
1. Necessary material
To get started, you will need:
- Filler (best to choose ready-mixed filler for screw holes)
- Spatula and putty knife
- Wire brush to clean and prepare the hole
- Sandpaper to smooth the surface
- Cloth or vacuum cleaner to remove dust
2. Preparing the hole
Before filling, use a wire brush to remove debris and lightly sandpaper around the hole to create a bonding surface. Make sure the area is clean and free of dust.
3. Application of the coating
Apply the filler using the spatula, making sure to fill the hole well and go slightly over the edges for complete coverage. Smooth out the excess to make sanding easier later.
4. Drying and sanding
Allow the filler to dry completely, following the manufacturer's instructions. Once dry, sand the surface with fine sandpaper to achieve a smooth finish.
5. Finishing and top coat
Clean the sanded area thoroughly, then apply a top coat if necessary to prepare the wall for painting or other treatments. Allow to dry before painting.
Take back the hole
After you've prepared and smoothed the wall through the previous steps, you'll probably want to paint the repaired surface so it blends in perfectly with the rest of the wall. Here's how to do it to achieve a professional result.
6. Preparation for painting
Before painting, make sure all dust and debris are completely removed from the surface and surrounding area. Use a slightly damp cloth to clean the area, this will help the paint adhere properly.
7. Applying the paint
- Choice of paint : Select a paint that matches the type and color of the existing wall. If you are unsure of the exact shade, a sample taken from the wall can be taken to a paint store to get an accurate match.
- Applying the undercoat : If the repair is extensive, it is advisable to use an undercoat to ensure an even finish. This will prevent the paint from absorbing unevenly.
- Paint : Apply the paint in thin coats using a roller or a brush for small areas. For best results, apply two coats, allowing them to dry completely between each coat.
- Cleaning : Clean your painting tools and put away any remaining materials. Save some paint for future touch-ups if needed.
8. Finishing and cleaning
- Checking and retouching : Once the paint is dry, inspect the area for any imperfections or missed areas. Touch up as needed.
By incorporating the painting step, your wall will not only look like new, but you will also have preserved and enhanced its aesthetic integrity, essential after attaching workout equipment such as a
Quick tip with toothpaste
For very small holes, such as those left by thumbtacks or small nails, white toothpaste can be a quick fix. Apply a small amount of toothpaste to the hole, smooth it out with your finger or a small spatula, and let it dry.
Conclusion
Repairing holes in walls after removing or moving a
However, to avoid having to repair holes in the future, consider using there


